Houdini OpenCL Master Class笔记
Houdini使用OpenCL实现GPU并行加速,并提供了OpenCL Sop节点,可以在几何体中随时使用。
这篇是Houdini 16.5 OpenCL Master Class教程视频的总结。
基础OpenCL使用
新建一个 10000 * 10000 的网格(越大越能体现OpenCL的加速效果?),我们首先使用 Vex 实现简单的正弦波运动:
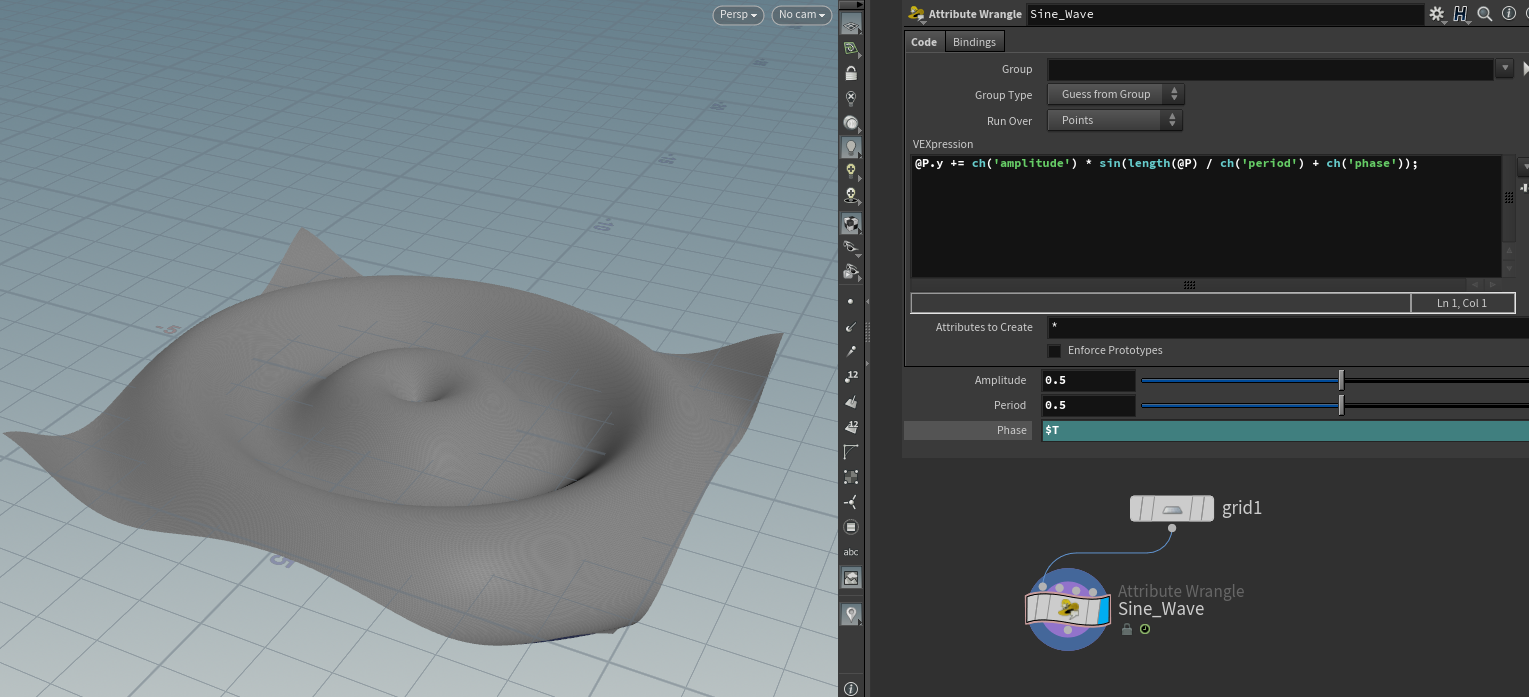
如何将cpu执行的vex改成gpu执行的opencl呢?
新建一个OpenCL节点,默认情况下会提示错误,勾选 Use Code Snippet ,可以得到一个code snippet窗口,接下来就可以在里面输入我们的opencl程序。
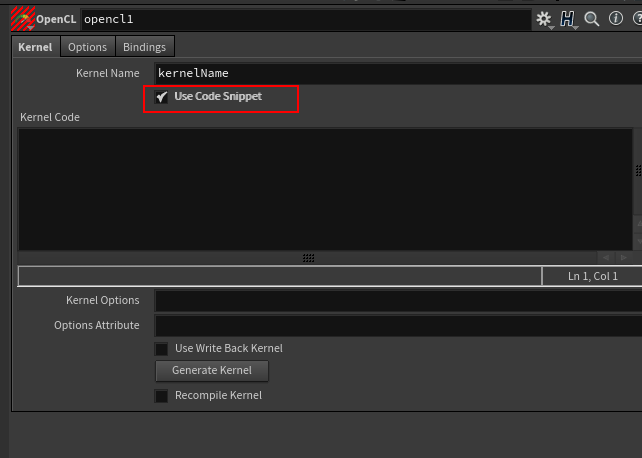
OpenCL 与 Cuda / Compute Shader 类似,每个程序都必须指定一个入口的 Kernel (或者称为main函数),随即该Kernel编译后将会在Gpu计算线程组中运行。
为了实现 Cpu-Gpu 数据交互,OpenCL提供了Bindings选项来绑定属性(Attribute)、变量等,按需加入:
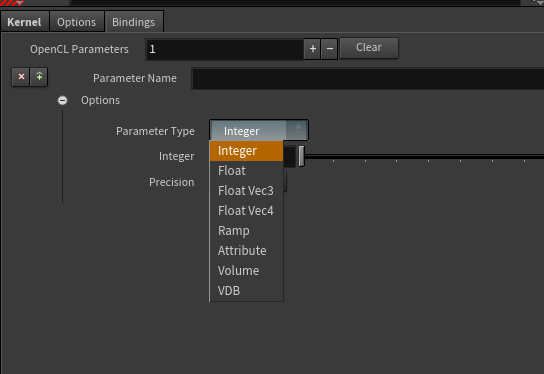
比如上面的正弦波vex,如果改写成OpenCL程序,那么需要提供 @P 属性(可读可写),振幅amplitude变量(可读),周期(可读)以及相位(可读)。
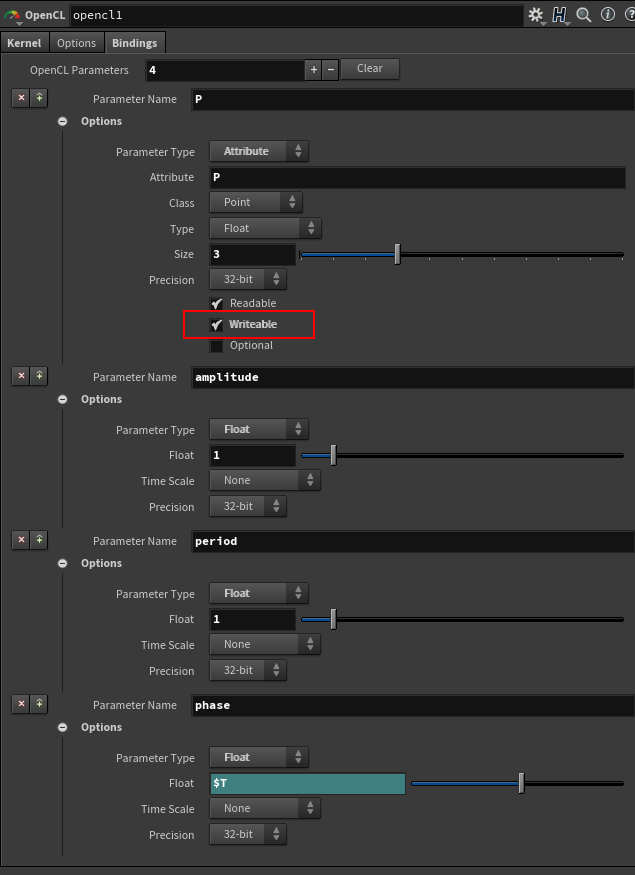
注意@P属性勾选Writable选项。
Attribute一般会有 Class 类别指示当前 OpenCL是运行在该几何体的哪个几何(Point、Vertex、Primitive、Detail)层级。
设置完Binds后点击 Generate Kernel可以生成模板函数:
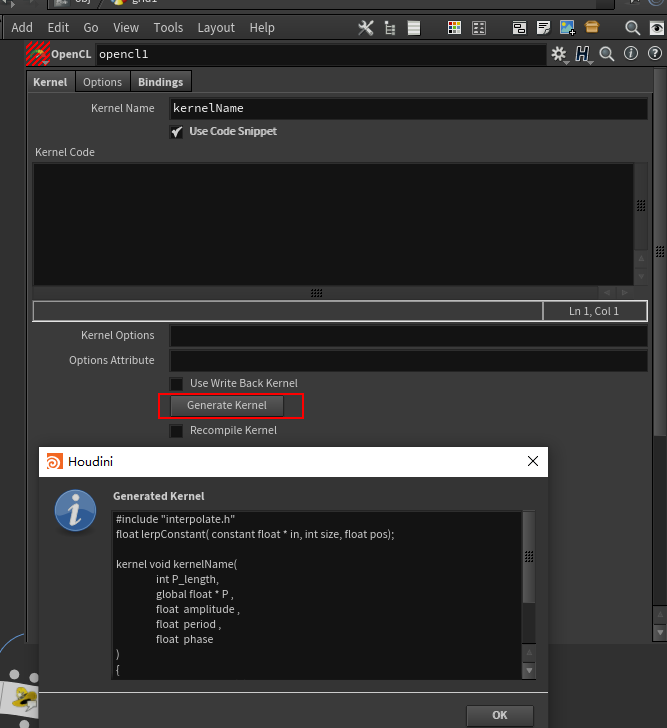
把它复制到 Code Snippet中即可。
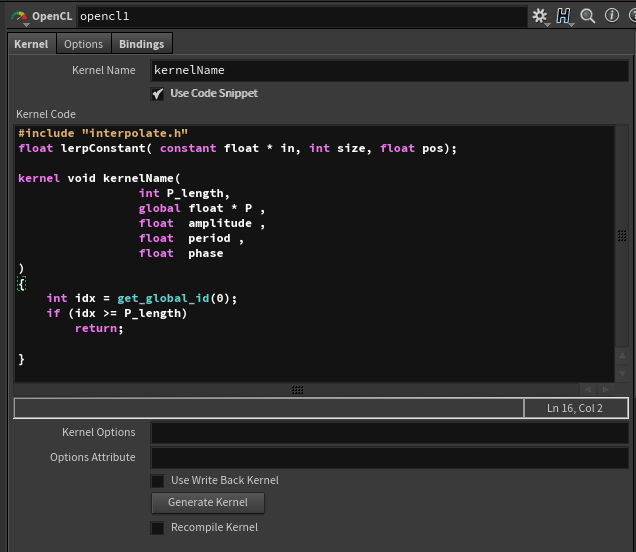
接下来的处理非常简单,基本按照常规Vex写法编写OpenCL即可:
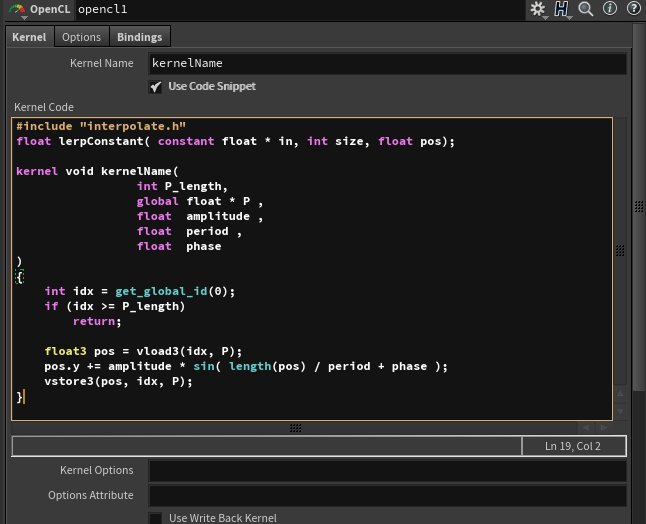
这里使用了新函数 vload3 来获取输入的属性(vector类型),实际上为OpenCL SDK中的 vloadn 函数,这里的3指示了指针数据组的长度。
同样,存储值则使用 vstore3 来存储数据。
性能对比
Grid 1000x1000 Vex VS OpenCL
运行240帧,OpenCL13.995s消耗,Vex13.277s消耗。

Grid 5000x5000 Vex VS OpenCL
运行30帧,OpenCL 32s消耗,Vex21s消耗。
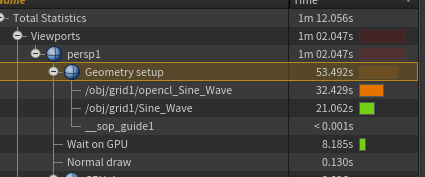
实际上把Gpu同步的等待的8.185s减去,OpenCL的运算时间还是比Vex要慢233。
因为OpenCL花费了大量的时间在显存 - 内存之间的数据Copy了,在使用Vulkan/DX的Compute Shader时也会有类似的问题,数据量巨大的简单计算,Gpu加速效果不明显,UAV复制写入时花费巨额时间,最后整体的时间反而不如多线程Simd加速的Cpu计算快。
在Houdini Sop中大部分节点操作都是需要频繁读取-写入,特别是Polygon类型的。
真正大幅度加速的是那种多次迭代,每次都使用上一次的计算结果的计算(卷积?),这样数据可以一直存放在显存中无需进行频繁的复制拷贝动作。
迭代型的OpenCL
首先是一个很简单的Smooth算法:遍历几何体的每个顶点,找到临近的点集,计算它们的坐标平均值然后作为该点的新坐标:
int npts[] = neighbours(0, @ptnum);
vector avg = @P;
foreach (int npt; npts)
{
    vector npos = point(0, 'P', npt);
    avg += npos;
}
avg /= len(npts)+1;
@P = avg;
可以多次Smooth,每次Smooth都在上一次的结果上继续,用一个for-feedback嵌套起来:
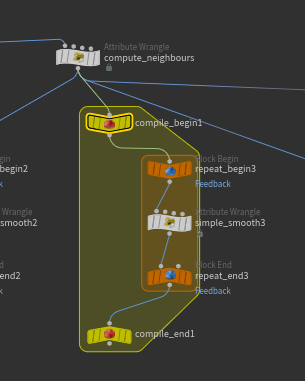
注意这里使用compile_block节点编译加速for-loop的多线程计算,并且opencl也能在compileblock节点中加速。
如果转化为opencl,则为:
kernel void kernelName(
                 int P_length,
                 global float * P ,
                 int npts_length,
                 global int * npts_index,
                 global int * npts,
                 int __scratch_length,
                 global float * __scratch
)
{
    int idx = get_global_id(0);
    if (idx >= P_length)
        return;

    float3 avg = vload3(idx, P);
    int startidx = npts_index[idx];
    int len = npts_index[idx+1] - startidx;
    for (int i = 0; i < len; i++)
    {
        int npt = npts[startidx + i];
        float3 npos = vload3(npt, P);
        avg += npos;
    }
    avg /= len + 1;
    vstore3(avg, idx, __scratch);
}

kernel void writeBack(
                 int P_length,
                 global float * P ,
                 int npts_length,
                 global int * npts_index,
                 global int * npts,
                 int __scratch_length,
                 global float * __scratch
)
{
    int idx = get_global_id(0);
    if (idx >= P_length)
        return;

    float3 avg = vload3(idx, __scratch);
    vstore3(avg, idx, P);
}
注意这里使用了 writeBack kernal来确保for-loop并行数据写入顺序不发生冲突,注意writeBack Kernal 发生在 Main Kernal后,并且使用同样的函数参数:
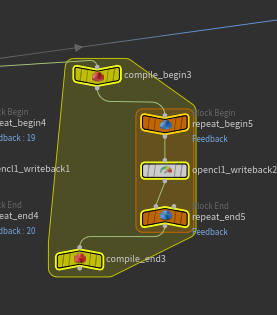
__scratch为额外绑定的Read-Write暂存属性:
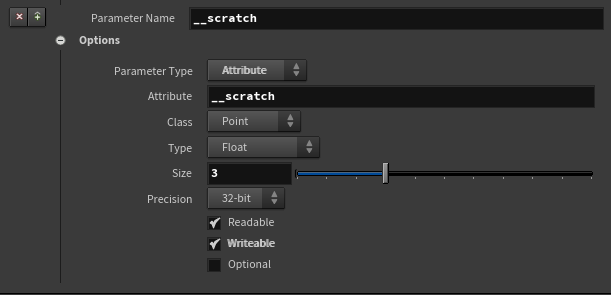
性能测试方面:10000面的几何体,Smooth次数 > 100时OpenCL速度开始超过vex。整体速度优化还是很明显的。
OpenCL处理地形
Houdini的地形就是一个volume,适合OpenCL加速。
首先是简单的高度平移,在Binding中需要绑定“height”层的信息:
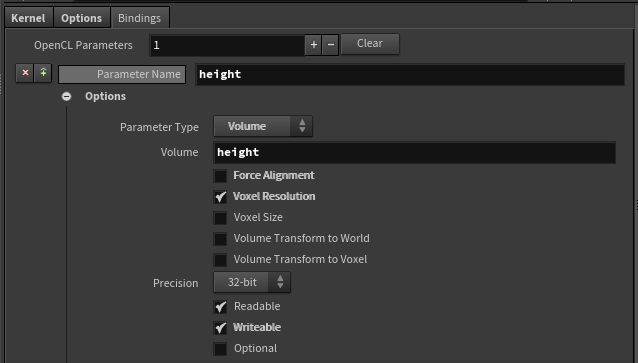
注意volume的选择,在点击generate code时会生成对应的参数输入:
kernel void kernelName(
                 int height_stride_x,
                 int height_stride_y,
                 int height_stride_z,
                 int height_stride_offset,
                 int height_res_x,
                 int height_res_y,
                 int height_res_z,
                 global float * height
)
{
    int gidx = get_global_id(0);
    int gidy = get_global_id(1);
    int gidz = get_global_id(2);
    int idx = height_stride_offset + height_stride_x * gidx
                               + height_stride_y * gidy
                               + height_stride_z * gidz;

    height[idx] += 100;
}
线程对应的idx会直接帮我们算好,这里直接加上100的单位平移。
接下来是高度模糊,也就是 HeightFieldBlur 节点的OpenCL。
算法比较简单,与几何体的Smooth类似,采样体素周围的其他体素“height”值,加起来求均值,注意边界情况,使用Clamp限制不要超出边界:
kernel void kernelName(
                 int height_stride_x,
                 int height_stride_y,
                 int height_stride_z,
                 int height_stride_offset,
                 int height_res_x,
                 int height_res_y,
                 int height_res_z,
                 global float * height,
                global float * __scratch
)
{
    int gidx = get_global_id(0);
    int gidy = get_global_id(1);
    int gidz = get_global_id(2);
    int idx = height_stride_offset + height_stride_x * gidx
                               + height_stride_y * gidy
                               + height_stride_z * gidz;

     float total = 0;
     for (int dx = -1; dx <= 1; dx++)
     {
        for (int dy = -1; dy <= 1; dy++)
        {
            for (int dz = -1; dz <= 1; dz++)
            {
                int srcidx = height_stride_offset
                                + height_stride_x * clamp(gidx+dx, 0, height_res_x-1)
                                + height_stride_y * clamp(gidy+dy, 0, height_res_y-1)
                                + height_stride_z * clamp(gidz+dz, 0, height_res_z-1);
                float src_height = height[srcidx];

                total += src_height;
            }
        }
     }

     __scratch[idx] = total/27;
}

kernel void writeBack(
                 int height_stride_x,
                 int height_stride_y,
                 int height_stride_z,
                 int height_stride_offset,
                 int height_res_x,
                 int height_res_y,
                 int height_res_z,
                 global float * height,
                global float * __scratch
)
{
    int gidx = get_global_id(0);
    int gidy = get_global_id(1);
    int gidz = get_global_id(2);
    int idx = height_stride_offset + height_stride_x * gidx
                               + height_stride_y * gidy
                               + height_stride_z * gidz;
    height[idx] = __scratch[idx];
}
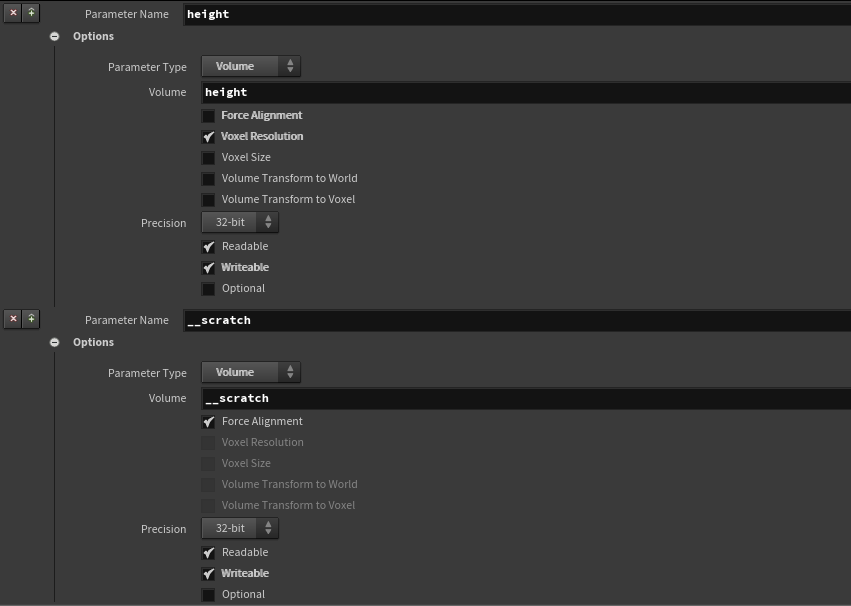
这里同样申请了__scratch和WriteBack Kernel来存储数据:
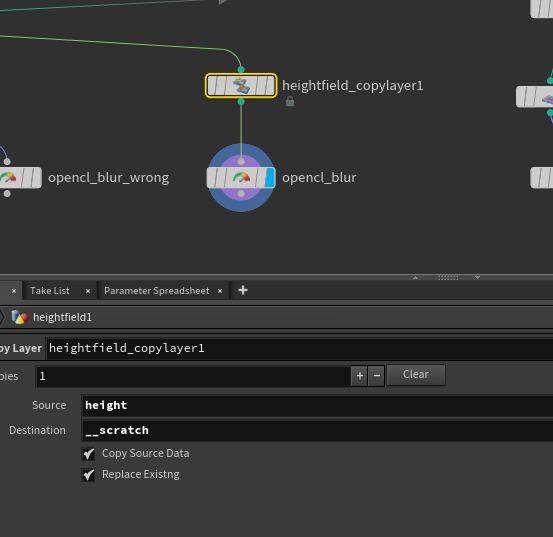
注意一点,__scratch可以勾选force_alignment选项,那么生成的代码不会就有 " stride 和 res“ 相关的信息,直接与前面volume信息对齐内存,简洁代码:
剩下的就是GPU数据类型强制转换的一些问题了,和GLSL、HLSL一样,OpenCL的数据类型是严格检查的强类型,使用时必须注意数据的类型,浮点型必须标记(1.0),整型为(1),不然会有奇奇怪怪的错误。
对于Mask输入,Houdini支持Optional输入(生成对应的检测宏),这样在输入的HF中不包含mask时可以直接使用#ifdef跳过而不是报错:

OpenCL部分代码如下:
kernel void kernelName(
                 int height_stride_x,
                 int height_stride_y,
                 int height_stride_z,
                 int height_stride_offset,
                 int height_res_x,
                 int height_res_y,
                 int height_res_z,
                 global float * height,
                 global float * __scratch
#ifdef HAS_mask
                 , global float * mask
#endif
)
{
    int gidx = get_global_id(0);
    int gidy = get_global_id(1);
    int gidz = get_global_id(2);
    int idx = height_stride_offset + height_stride_x * gidx
                               + height_stride_y * gidy
                               + height_stride_z * gidz;

#ifdef HAS_mask
     if (mask[idx] < 0.5)
     {
        __scratch[idx] = height[idx];
        return;
     }
#endif
     float total = 0;
     for (int dx = -1; dx <= 1; dx++)
     {
        for (int dy = -1; dy <= 1; dy++)
        {
            for (int dz = -1; dz <= 1; dz++)
            {
                int srcidx = height_stride_offset
                                + height_stride_x * clamp(gidx+dx, 0, height_res_x-1)
                                + height_stride_y * clamp(gidy+dy, 0, height_res_y-1)
                                + height_stride_z * clamp(gidz+dz, 0, height_res_z-1);
                float src_height = height[srcidx];

                total += src_height;
            }
        }
     }

     __scratch[idx] = total/27;
}

kernel void writeBack(
                 int height_stride_x,
                 int height_stride_y,
                 int height_stride_z,
                 int height_stride_offset,
                 int height_res_x,
                 int height_res_y,
                 int height_res_z,
                 global float * height,
                 global float * __scratch
#ifdef HAS_mask
                 , global float * mask
#endif
)
{
    int gidx = get_global_id(0);
    int gidy = get_global_id(1);
    int gidz = get_global_id(2);
    int idx = height_stride_offset + height_stride_x * gidx
                               + height_stride_y * gidy
                               + height_stride_z * gidz;
    height[idx] = __scratch[idx];
}
OpenCL处理体积与几何体
其实地形就是一种体积了,这里给出更通用的一种实例:
实现效果为:一个几何体,一个体积,要求几何体与体积相交的点给上特定的颜色。

这里Merge后作为OpenCL节点的输入:
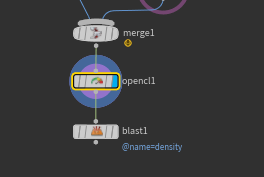
其中,体积为name = density的primitive:

在OpenCL的Binding注意顺序:
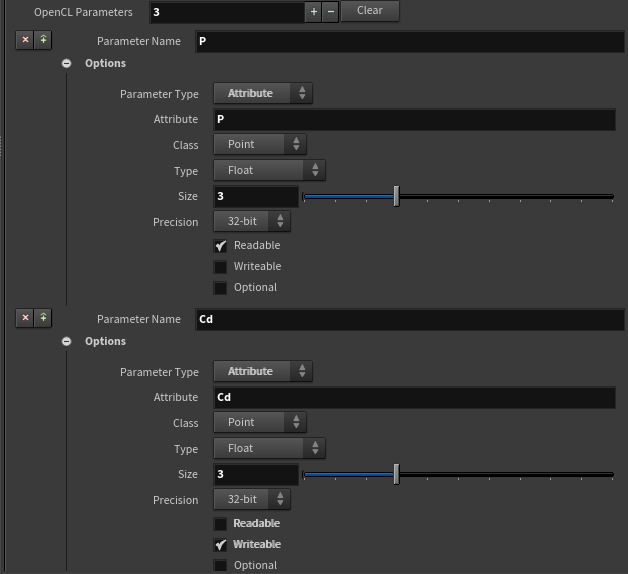
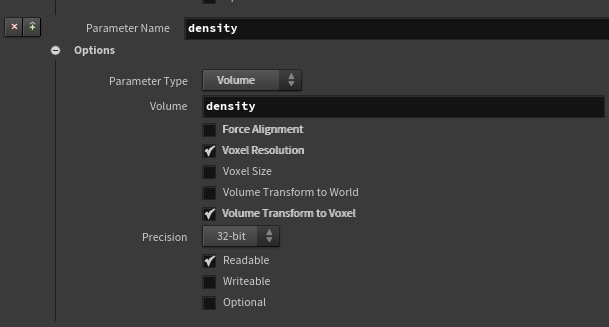
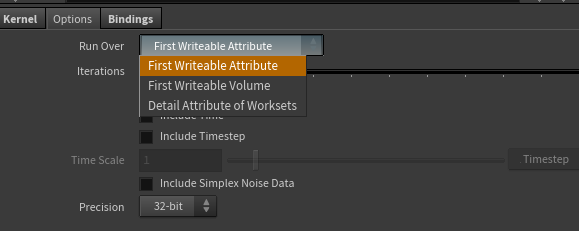
因为我们想对几何体做处理,所以选择 ”First Writeable Attribute“ 而不是 Volume:
OpenCL代码部分也是非常简单的,先得到当前点的坐标,然后转化为体素坐标,获取该体素的密度值,> 0.5则改变顶点色:
kernel void kernelName(
                 int P_length,
                 global float * P ,
                 int Cd_length,
                 global float * Cd ,
                 int density_stride_x,
                 int density_stride_y,
                 int density_stride_z,
                 int density_stride_offset,
                 int density_res_x,
                 int density_res_y,
                 int density_res_z,
                 float16 density_xformtovoxel,
                 global float * density
)
{
    int idx = get_global_id(0);
    if (idx >= Cd_length)
        return;

    float3 pos = vload3(idx, P);

    float4 voxelpos = pos.x * density_xformtovoxel.lo.lo +
                      pos.y * density_xformtovoxel.lo.hi +
                      pos.z * density_xformtovoxel.hi.lo +
                      density_xformtovoxel.hi.hi;
    int3 voxelidx;
    voxelidx.x = clamp((int)(floor(voxelpos.x)), 0, density_res_x-1);
    voxelidx.y = clamp((int)(floor(voxelpos.y)), 0, density_res_y-1);
    voxelidx.z = clamp((int)(floor(voxelpos.z)), 0, density_res_z-1);

    float3 c = 1;

    float d = density[density_stride_offset +
                      density_stride_x * voxelidx.x +
                      density_stride_y * voxelidx.y +
                      density_stride_z * voxelidx.z];
    if (d > 0.5)
        c.y = 0;

    vstore3(c, idx, Cd);
}
结果如下:
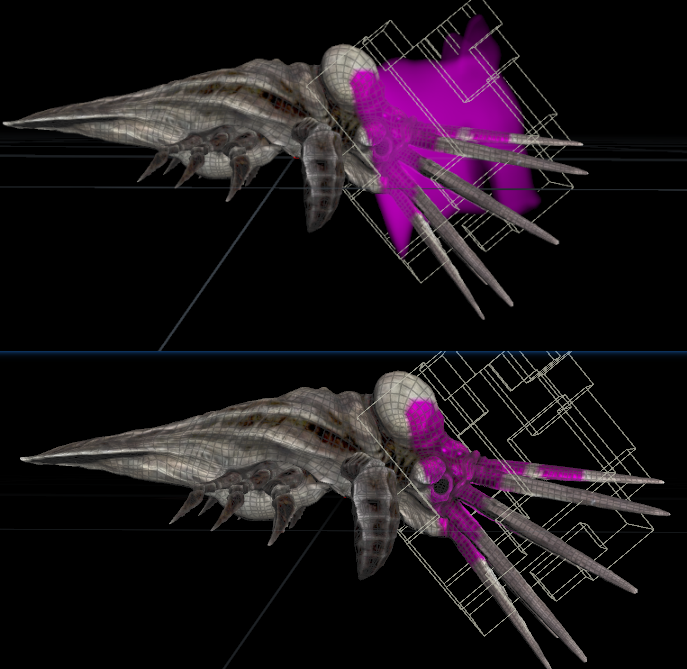
总结
OpenCL作为Houdini的主要GPU加速节点,已经有了广泛的应用,传统的HeightField工具,大部分都已经使用OpenCL重写了一遍,它们是非常好的OpenCL参考资料。
Vex的计算速度大多数情况都能满足需求了(特别是游戏业),除非有大规模的计算,有很高的性能需求,不然不建议上OpenCL。
OpenCL的内置计算数学库还是比较少的,缺乏开箱即用的几何数学函数,语言也比较原始,写起来容易出错(报错信息特别反人类)。
之后有空的话会尝试一下OpenCL版的烟雾模拟,估计计算速度会比Vex快上不少,但肯定会比ComputeShader慢。